Maple Pecan Coffee Cake

A Delicious Whoops

I have a saying when I’m baking/cooking; “Could it possibly be bad?” The answer is often no, if you have two tasty things they are often tasty together. Things did not go as planned in this recipe, but the product was still super delicious. What an endearing metaphor, that is impossible to apply to your life, mistakes usually still taste good. No, they don’t, but in baking, they can, and often do.

The thought for this recipe started with me wondering about what’s local to Western New York. We have only a few things here to call our own, beautiful falls, brutal winters, a distinct lack of sunlight, and maple syrup. Maple syrup, also known as ambrosia (just kidding, but only kind of), is a truly regional product. Its made in many more places than just Western New York, apparently most of the world’s maple syrup is made in Quebec, but each place has its own taste, its own terroir. Anyway, if you know how delicious real maple syrup is, you can understand why I wanted to use it in a bake.

It turns out, there is a flavor wheel for maple syrup, who knew.

Some initial questions about maple syrup and its roll in baking:

  • How do substitutions work between syrup and sugar?
  • Is it different for brown or granulated sugar?
  • How do things change when you use a liquid sugar vs a solid sugar?

I decided, for no particular reason at all, that a maple pecan coffee cake was a way to try to begin to understand maple syrup. I adapted bon appetit’s New York Style Crumb Cake.

Maple Pecan Coffee Cake

For the cake:

  • 2 1/2 cups (about 10 oz) all-purpose flour
  • 1 tsp baking soda
  • 3/4 tsp baking powder
  • 1/2 tsp salt
  • 3/4 cup (6 oz) unsalted butter, room temp
  • 1 1/2 cups granulated sugar
  • 2 large eggs
  • 2/3 cup sour cream
  • 2/3 cup greek yogurt
  • 1 tsp vanilla extract

For the topping:

  • 1 1/2 cups maple sugar
  • 1 1/2 tsp cinnamon
  • 1 cup toasted pecans
  • 1/2 tsp salt
  • 1 cup (8 oz) unsalted butter, melted and warm
  • 2 1/2 cups (about 10 oz) all-purpose flour

Method:

For the cake:

  1. Oven to 350° F
  2. Butter a 13×9 baking dish
  3. Sift flour, baking soda, baking powder, and salt into a medium bowl
  4. In a stand mixer, cream room temperature butter
  5. Add sugar and beat until light and fluffy
  6. Add eggs one at a time beating well after each egg
  7. Add sour cream, yogurt, and vanilla, beat just to combine
  8. Add flour mix a third at a time, beating until incorporated after each addition
  9. Move batter to baking dish and spread evenly

For the topping:

  1. Mix maple syrup, cinnamon, and salt together in a medium bowl
  2. Add melted warm butter and stir well
  3. Add flour and mix
  4. Add toasted nuts
  5. Spread over the cake batter
  6. Bake for approximately an hour, check cake after 45 min by inserting a toothpick and seeing if it comes out clean
  7. Cool on wire rack

The idea was to generally replicate their recipe except to use maple syrup in the topping instead. It may be obvious, but I wasn’t sure what would happen if I substituted a liquid sugar for solid sugars, but I thought this would be a good way to figure it out. I assumed that regardless of the state, the flour would cause clumping, but I was wrong! Instead, it resulted in a batter like substance that I wasn’t able to turn into clumps. So I ran with it, and that is the instruction you see above.

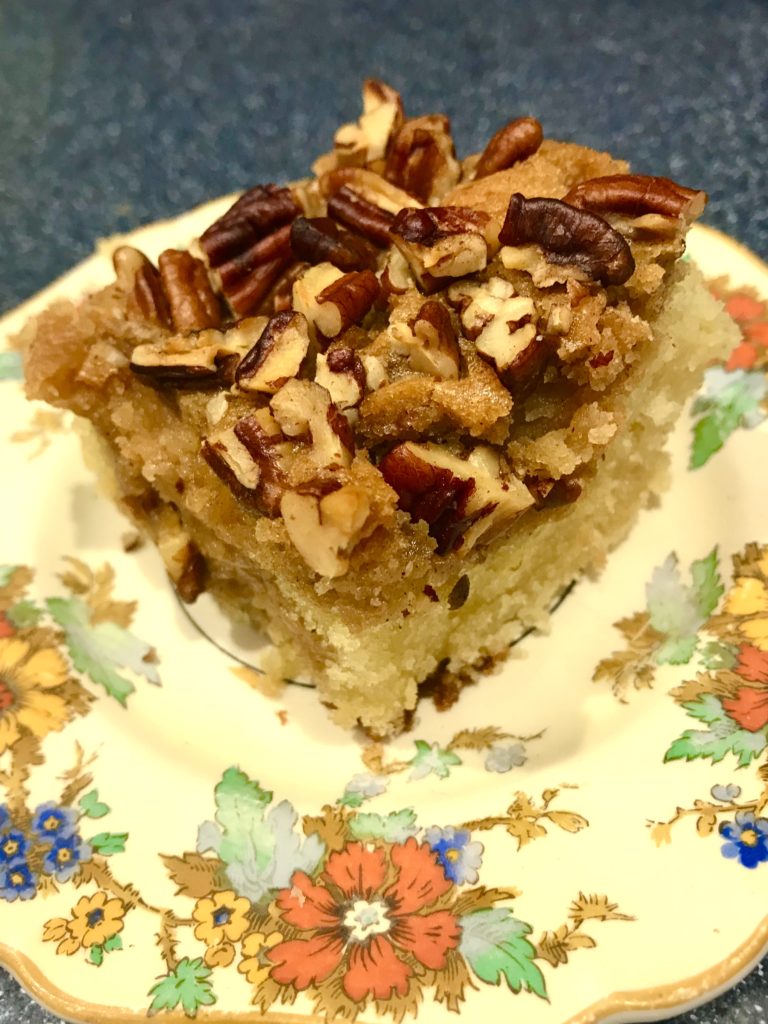
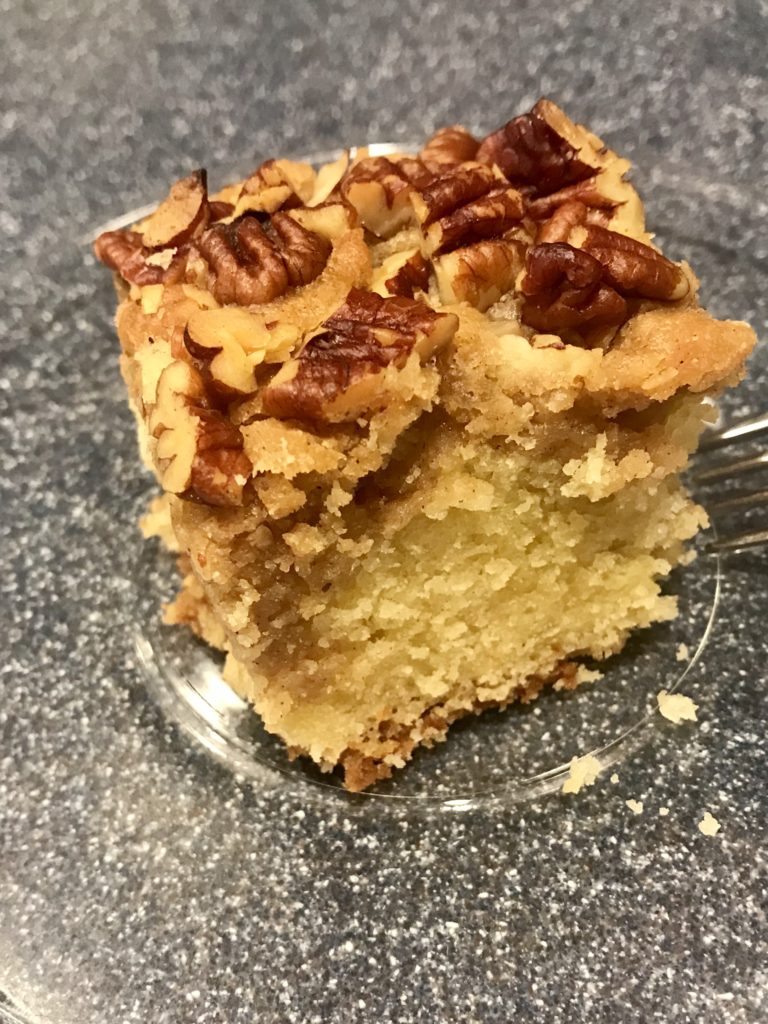
During the bake, the topping dropped into varying depths of the cake, and some remained on top as well. It created a wonderful marbling throughout the cake, which can sort of be seen in the picture below.

Next time I try this, I plan on creating maple sugar to try for the topping. After deep diving on maple syrup for this article, I realized I could just solve the issue of substituting a liquid for solids by making the liquid a solid.

Regardless, I was still happy with how this turned out, the marbling of the topping made it feel unique and it made it so that every bite was a little different.

Kardemummabullar

A Swedish Cardamom Bun:

I, like every sane and good person, love the The Great British Bake Off. Henry Bird from last season was my ‘pony’, my choice for who was going to win, so I got super excited when I found his Chocolate Kardemummabullars recipe.

I saw the picture and immediately knew I wanted to make them. Beautiful pastries that are supposed to go with coffee (the only thing I may like more than pastries themselves), and they have cardamom. I needed no more reasons than that to bake them, but they also had the most ridiculous name, so I couldn’t resist.

The only thing that Henry’s recipe left out was a clear idea of how to twist and roll these buns into their shapes. I found this YouTube video very helpful (just jump to 3:15) :

  • I should note that I didn’t follow this video exactly. I did twist the two ‘legs’ of the dough individually, and opposite directions, like Henry does, and then followed the video for the ‘winding’ of the buns.

So I went ahead and made them, and then joyfully ate them. They smell totally intoxicating, honey and cardamom as soon as your face gets anywhere near them. At first bite, you get honey, maple syrup, cinnamon and in the background cardamom. Its a light dough, albeit a little dry. A truly delicious thing, made for fika.

This was an incredibly fun bake from start to finish, and it resulted in a beautiful, delicious product, but now, I have questions.

Questions and thoughts:

The dough ultimately was a little dry for me. In the context of a cup of coffee, which is how these are meant to be enjoyed, it’s just right, but as a stand alone thing they were too dry. I wonder if a tangzhong is the move? Or perhaps, I should just substitute out this dough for the genius dough that Sarah Kieffer, writer of the Vanilla Bean Blog, uses in her cinnamon rolls, which are the softest, gooiest, most delicious cinnamon rolls ever. I think another potential solution to the dryness might be more glaze.

Beyond the dough, I had some qualms with how the flavors rang through. I got cinnamon first and cardamom second. I, and my other tasters, got no hint of either chocolate or almond. I was hoping the order of flavors might be cardamom, chocolate, almond, and then cinnamon.

Possible adjustments for next time:

  • Get rid of the cinnamon all together.
  • Increase the amount of chocolate crème pâtissière, which might help with the dryness of the dough as well.
  • Add toasted almonds on top, which should help bring out the almond that is in filling
  • Maybe add a little almond extract to the dough.

If any of you have thoughts on how to improve the kardemummabullars or how to achieve my desires, let me know!

I’ll report back when my tasters are lucky enough to have them grace the kitchen again.

Molasses Cookies

An exercise in understanding the difference between melting and creaming butter

Molasses cookies are not something I would associate with much of anything. It seems that most people who enjoy molasses cookies have some sort of nostalgia for them. No, for me, they are interesting for two reasons; one, they are a very simple and a quick recipe. Two, they are an opportunity to play with big flavors. I love the heat that can come from ginger, and I love the idea of dessert’s flavor that goes beyond just sweetness.

Melted Butter

The first time I went to bake them, I realized very quickly that people have a wide range of opinions on how they should be, and the recipes reflect that. Initially, I selected Allison Roman’s Chewy Molasses Cookies, which produced excellent results (I did add some more spices: 3/4 tsp of ground cloves and about a 1/4 tsp of nutmeg): very chewy, moist, and soft cookie. But then after my partner said that they were close to her great-grandmother’s, which her mother confirmed upon tasting, I was curious what that recipe was. Which then made me curious about the differences. I proceeded to look at 23 more molasses cookie recipes, which generated a plethora of questions:

  • What is molasses?
  • What is the difference between light and dark molasses?
  • What happens when you melt the butter vs cream the butter?
  • What happens when you use shortening vs butter?
  • What is shortening?
  • How do you bring out the heat of ginger?
  • What happens if you use fresh ginger?

As you can see from the links, many, if not all, of these questions were just a Wikipedia page away, however, these questions made me realize that molasses cookies would be a great way for me to test and try to find some of these answers for myself.

So, I made two of the exact same recipe except in one I creamed the butter and chilled it for an hour*, and in the other I melted the butter and chilled it for 20 minutes*.

I started with an adapted version of the aforementioned Allison Roman recipe. I wanted more general spiciness and I was looking to achieve heat from the ginger as well, so I again kicked up the spices:

  • 2 Cups (8 1/2 oz) all-purpose flour
  • 2 tsp baking soda
  • 1 1/2 tsp (3g) cinnamon
  • 2 tsp (4g) ground ginger
  • 3/4 tsp (2g) cardamom
  • 1/4 tsp (1g) nutmeg
  • 3/4 tsp (2g) ground cloves
  • 1/2 tsp kosher salt (I like to use a coarser grind so it stands out)
  • 1 large egg
  • 1/2 cup (4 oz) unsalted butter, melted (or soft)
  • 1/3 cup granulated sugar
  • 1/3 cup dark molasses
  • 1/4 cup packed dark brown sugar
  • Coarse sugar for rolling

Method for melted butter:

  1. Preheat oven to 375 F
  2. Measure out spices in small bowl, taste and adjust
  3. Sift flour and baking soda into a small bowl, add spices and whisk to combine
  4. Whisk egg, melted butter, sugar molasses, and brown sugar into medium bowl
  5. Mix dry ingredients to combine
  6. Cover with plastic and chill mixture for about 20 minutes*
  7. Place coarse sugar in a shallow dish
  8. Scoop a Tbs of dough and roll into balls and then roll in sugar
  9. Place on parchment lined baking sheets 2″ apart
  10. Bake for 8-10 min (in my oven it was 9 minutes 35 seconds)
  11. Wire rack to cool

Method for creamed butter:

  1. Follow steps 1 through 3 from above
  2. In a stand mixer with paddle attachment, beat softened butter on medium-high speed while adding in both sugars, beat until creamy, about 2 minutes
  3. Add egg, beat on medium speed until combined, about 1 minute
  4. Add flour mixture slowly, about a third at a time, and beat on low speed until combined
  5. Cover with plastic and chill for an hour*
  6. Follow steps 7 through 11 from above

*A note on chilling time:

  • I found that in the creamed butter recipe, the dough was too sticky to roll after 20 minutes of chilling, so I decided to chill it for an hour. But does this make a big difference in the final product?

Results:

Up until I tasted them, I thought there was going to be little to no difference. The only thing I really noticed while making them was that the dough felt slightly different when rolling them into balls, the creamed butter dough was stickier. But, upon tasting them, there was a huge textural difference, and in my opinion, the melted butter cookie communicated the spices better. Some other tasters, my father for example, said the exact opposite, that the creamed butter cookie was spicier. As far as the texture goes, the melted butter cookie was much chewier, in a good way I think. The creamed butter cookie’s texture reminded me of the Nestle chocolate chip cookie texture, not cakey but cakey-er, more cookie like, for lack of better words. You can see in the picture that the creamed cookie didn’t spread out as much, which I suspect is part of the reason they were puffier, fluffier.

Melted butterCreamed Butter
– Thinner cookie-Slightly puffier
-Chewier texture-Lighter texture, more cookie like

When I started writing this post, this was about all the information I had on the subject of butter, since then, I’ve found a perfect explanation as to whats going on with creamed butter:

When you cream softened butter and sugar, the grains of sugar are forced through the fat, leaving millions of microscopic air bubbles in their wake. In the heat of the oven these bubbles expand, contributing to the lightness of the finished product. Room-temperature butter is best for aeration (about 67 degrees). If the butter is too firm and cold, air cannot be incorporated into the fat; if it’s too soft and warm, the bubbles collapse.

“Cooks Science” By the Editors of Cooks Illustrated and Guy Crosby, PhD

and melted butter:

Butter softens between 60 and 68 degrees and melts starting at 84 degrees and liquefies at 94 degrees. The water in liquefied butter is helpful in certain applications — for example, mixing with flour to create chewy, not crunchy, cookies. Melting frees up water to hydrate wheat flour and produce stronger gluten, hence more chew in cookies or more structure in bread.

“Cooks Science” By the Editors of Cooks Illustrated and Guy Crosby, PhD

So, the chewiness of the melted butter cookies comes from stronger gluten in the cookie. What I called the cakey-ness, or puffiness, of the creamed butter cookie was a function of the air bubbles, created by creaming sugar into butter, expanding when baked.

Also, the kicked up spices answered the question of “How do you convey the heat of ginger?” It’s exactly what I, and probably anybody who took two seconds to think about it, expected, more ginger equals more heat. The heat rang through in both cookies, not on every bite, but just enough that it was enjoyable and the goal was achieved.

Still, unanswered questions remain:

  • What happens when you use shortening vs butter?
  • What happens if you use fresh ginger?

And new ones have arisen:

  • Does what does chilling time effect?
  • Does chilling time effect the creamed butter differently than the melted butter?

I will have to give my tasters a small break as they have been recently inundated with molasses cookies, but soon enough I’ll test these questions too.